Command-Line Interface (CLI)
Repository

Subscribe to our newsletter
📬 Receive new lessons straight to your inbox (once a month) and join 40K+ developers in learning how to responsibly deliver value with ML.
Intuition
In the previous lesson, we organized our code from our notebook into individual Python scripts. We moved our functions and classes into their respective scripts and also created new workload functions to execute the main ML workloads (ex. train_model function from madewithml/train.py script). We now want to enable users to execute these workloads from the terminal without having to know anything about our code itself.
Methods
One way to execute these workloads is to import the functions in the Python script and execute them one at a time:
1 2 | |
Caution: Don't forget to run
export PYTHONPATH=$PYTHONPATH:$PWDin your terminal to ensure that Python can find the modules in our project.
While this may seem simple, it still requires us to import packages, identify the input arguments, etc. Therefore, another alternative is to place the main function call under a if __name__ == "__main__" conditional so that it's only executed when we run the script directly. Here we can pass in the input arguments directly into the function in the code.
1 2 3 | |
python madewithml/train.py
However, the limitation here is that we can't choose which function from a particular script to execute. We have to set the one we want to execute under the if __name__ == "__main__" conditional. It's also very rigid since we have to set the input argument values in the code, unless we use a library like argparse.
1 2 3 4 5 6 7 8 | |
--threshold is optional since it has a default value):
python madewithml/serve.py --run_id $RUN_ID
We use argparse in our
madewithml/serve.pyscript because it's the only workload in the script and it's a one-line function call (serve.run()).
Compared to using functions or the __main__ conditional, a much better user experience would be to execute these workloads from the terminal. In this lesson, we'll learn how to build a command-line interface (CLI) so that execute our main ML workloads.
Typer
We're going to create our CLI using Typer. It's as simple as initializing the app and then adding the appropriate decorator to each function operation we wish to use as a CLI command in our script:
1 2 3 4 5 6 7 8 9 10 11 12 | |
Inputs
You may notice that our function inputs have a lot of information besides just the input name. We'll cover typing (str, List, etc.) in our documentation lesson but for now, just know that Annotated allows us to specify metadata about the input argument's type and details about the (required) option (typer.Option).
We make all of our input arguments optional so that we can explicitly define them in our CLI commands (ex.
--experiment-name).
We can also add some helpful information about the input parameter (with typer.Option(help="...")) and a default value (ex. None).
Usage
With our CLI commands defined and our input arguments enriched, we can execute our workloads. Let's start by executing our train_model function by assuming that we don't know what the required input parameters are. Instead of having to look in the code, we can just do the following:
python madewithml/train.py --help
Usage: train.py [OPTIONS]
Main train function to train our model as a distributed workload.
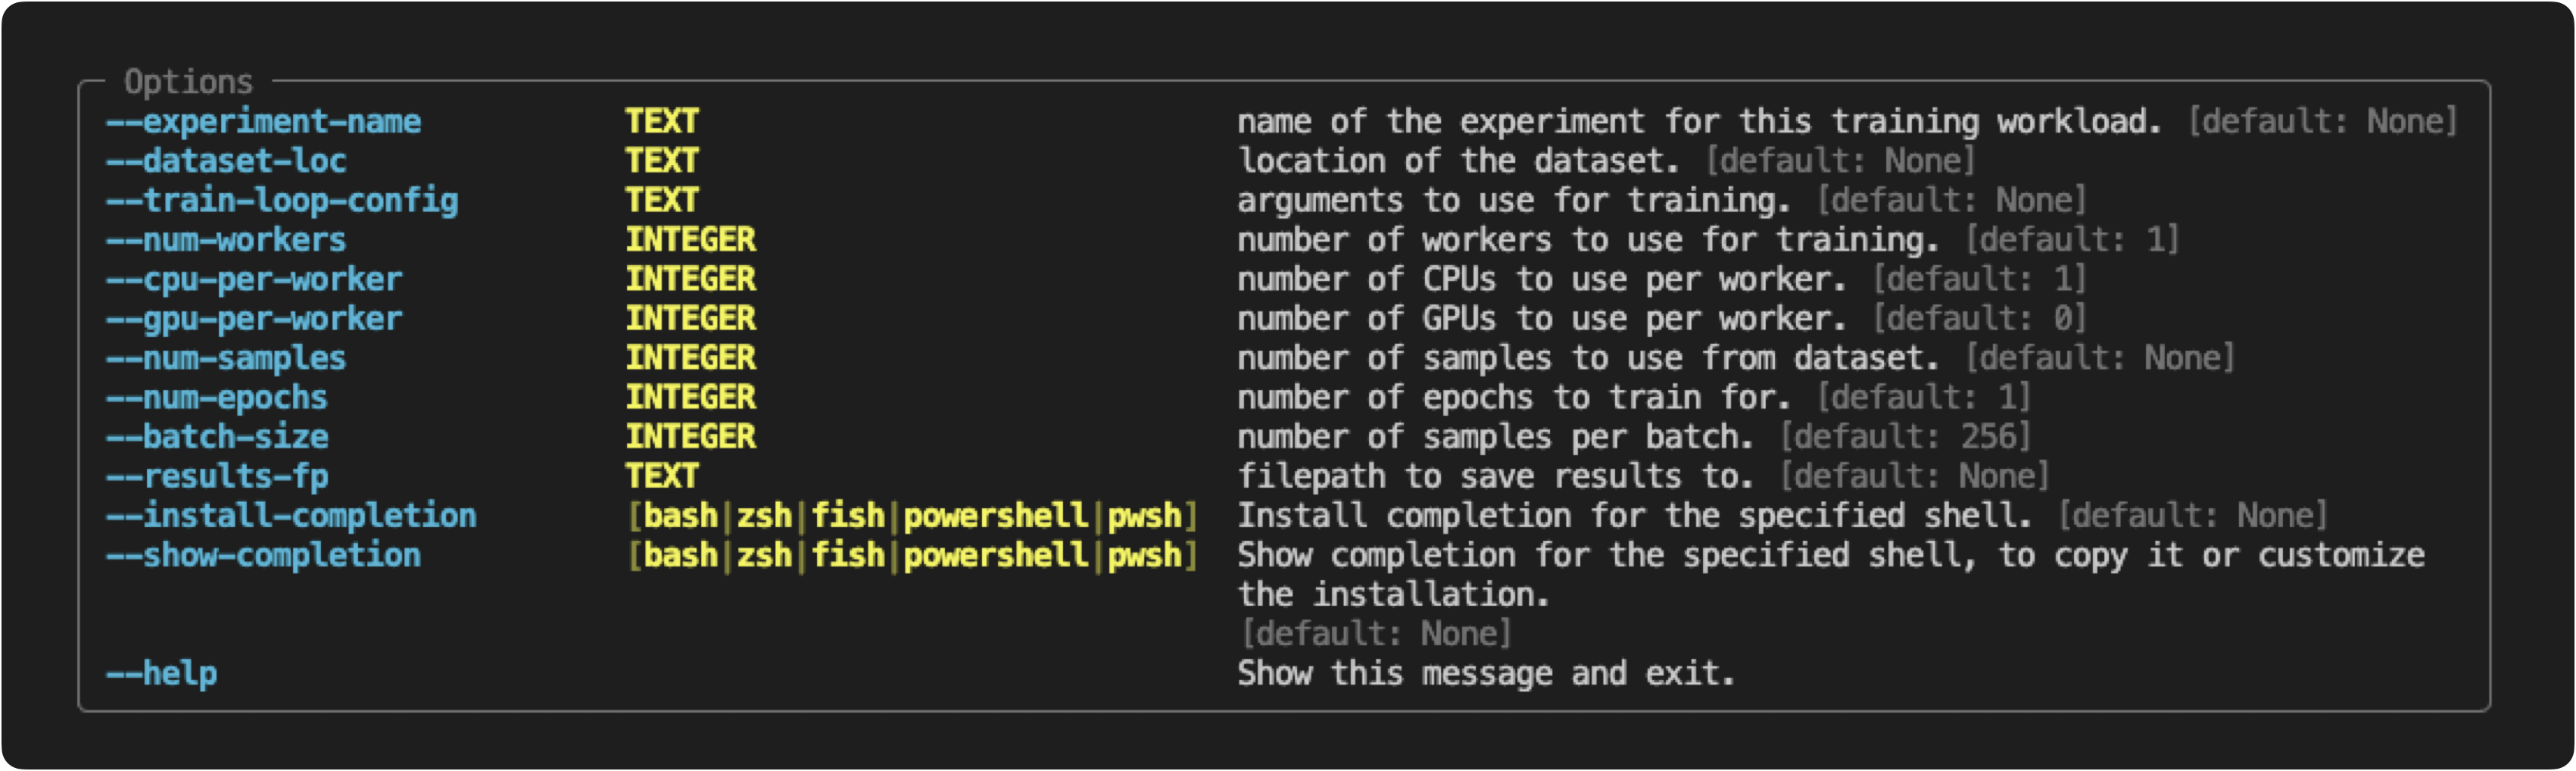
We can follow this helpful message to execute our workload with the appropriate inputs.
export EXPERIMENT_NAME="llm"
export DATASET_LOC="https://raw.githubusercontent.com/GokuMohandas/Made-With-ML/main/datasets/dataset.csv"
export TRAIN_LOOP_CONFIG='{"dropout_p": 0.5, "lr": 1e-4, "lr_factor": 0.8, "lr_patience": 3}'
python madewithml/train.py \
    --experiment-name "$EXPERIMENT_NAME" \
    --dataset-loc "$DATASET_LOC" \
    --train-loop-config "$TRAIN_LOOP_CONFIG" \
    --num-workers 1 \
    --cpu-per-worker 10 \
    --gpu-per-worker 1 \
    --num-epochs 10 \
    --batch-size 256 \
    --results-fp results/training_results.json
Be sure to check out our
README.mdfile as it has examples of all the CLI commands for our ML workloads (train, tune, evaluate, inference and serve).
Upcoming live cohorts
Sign up for our upcoming live cohort, where we'll provide live lessons + QA, compute (GPUs) and community to learn everything in one day.
To cite this content, please use:
1 2 3 4 5 6 | |