Documenting Code
Repository · Documentation

Subscribe to our newsletter
📬 Receive new lessons straight to your inbox (once a month) and join 40K+ developers in learning how to responsibly deliver value with ML.
Intuition
Code tells you how, comments tell you why. -- Jeff Atwood
We can really improve the quality of our codebase by documenting it to make it easier for others (and our future selves) to easily navigate and extend it. We know our code base best the moment we finish writing it but fortunately documenting it will allow us to quickly get back to that familiar state of mind. Documentation can mean many different things to developers, so let's define the most common components:
comments: short descriptions as to why a piece of code exists.typing: specification of a function's inputs and outputs' data types, providing information pertaining to what a function consumes and produces.docstrings: meaningful descriptions for functions and classes that describe overall utility, arguments, returns, etc.docs: rendered webpage that summarizes all the functions, classes, workflows, examples, etc.
Typing
It's important to be as explicit as possible with our code. We've already discussed choosing explicit names for variables, functions but another way we can be explicit is by defining the types for our function's inputs and outputs by using the typing library.
So far, our functions have looked like this:
1 2 | |
But we can incorporate so much more information using typing:
1 2 3 | |
Here we've defined:
- input parameter
ais a list - input parameter
bis an integer with default value 0 - output parameter
cis a NumPy array
There are many other data types that we can work with, including List, Set, Dict, Tuple, Sequence and more, as well as included types such as int, float, etc. You can also use types from packages we install (ex. np.ndarray) and even from our own defined classes (ex. LabelEncoder).
Starting from Python 3.9+, common types are built in so we don't need to import them with
from typing import List, Set, Dict, Tuple, Sequenceanymore.
Docstrings
We can make our code even more explicit by adding docstrings to describe overall utility, arguments, returns, exceptions and more. Let's take a look at an example:
1 2 3 4 5 6 7 8 9 10 11 12 13 14 15 16 17 18 19 20 21 22 23 24 25 | |
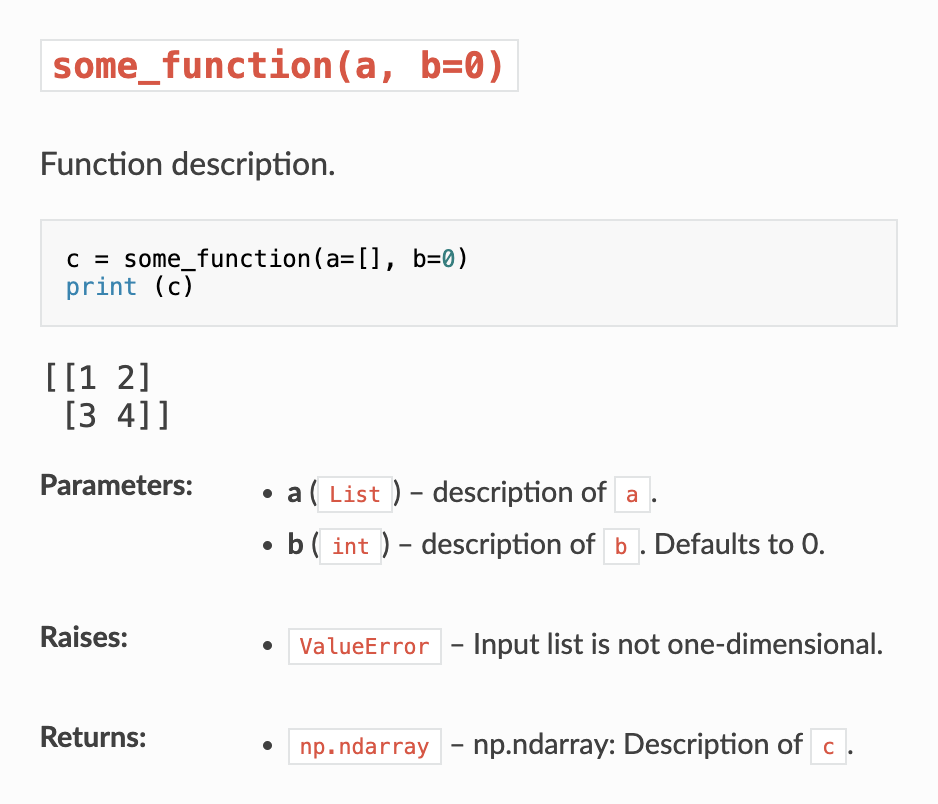
Let's unpack the different parts of this function's docstring:
[Line 3]: Summary of the overall utility of the function.[Lines 5-12]: Example of how to use our function.[Lines 14-16]: Description of the function's input arguments.[Lines 18-19]: Any exceptions that may be raised in the function.[Lines 21-22]: Description of the function's output(s).
We'll render these docstrings in the docs section below to produce this:
Take a look at the docstrings of different functions and classes in our repository.
1 2 3 4 5 6 7 8 9 10 11 12 13 14 | |
Tip
If using Visual Studio Code, be sure to use the Python Docstrings Generator extension so you can type """ under a function and then hit the Shift key to generate a template docstring. It will autofill parts of the docstring using the typing information and even exception in your code!
Docs
So we're going through all this effort of including typing and docstrings to our functions but it's all tucked away inside our scripts. What if we can collect all this effort and automatically surface it as documentation? Well that's exactly what we'll do with the following open-source packages → final result here.
-
Initialize mkdocs
This will create the following files:python3 -m mkdocs new .. ├─ docs/ │ └─ index.md └─ mkdocs.yml -
We'll start by overwriting the default
index.mdfile in ourdocsdirectory with information specific to our project:index.md 1 2 3 4 5 6 7 8
## Documentation - [madewithml](madewithml/config.md): documentation for functions and classes. ## Course Learn how to combine machine learning with software engineering to design, develop, deploy and iterate on production ML applications. - Lessons: [https://madewithml.com/](https://madewithml.com/#course) - Code: [GokuMohandas/Made-With-ML](https://github.com/GokuMohandas/Made-With-ML) -
Next we'll create documentation files for each script in our
madewithmldirectory:mkdir docs/madewithml cd docs/madewithml touch config.md data.md evaluate.md models.md predict.md serve.md train.md tune.md util.md cd ../../
Tip
It's helpful to have the docs directory structure mimic our project's structure as much as possible.
-
Next we'll add
madewithml.<SCRIPT_NAME>to each file underdocs/madewithml. This will populate the file with information about the functions and classes (using their docstrings) frommadewithml/<SCRIPT_NAME>.pythanks to themkdocstringsplugin.Be sure to check out the complete list of mkdocs plugins.
# docs/madewithml/data.md ::: madewithml.data -
Finally, we'll add some configurations to our
mkdocs.ymlfile that mkdocs automatically created:site_name: Made With ML site_url: https://madewithml.com/ repo_url: https://github.com/GokuMohandas/Made-With-ML/ nav: - Home: index.md - madewithml: - data: madewithml/data.md - models: madewithml/models.md - train: madewithml/train.md - tune: madewithml/tune.md - evaluate: madewithml/evaluate.md - predict: madewithml/predict.md - serve: madewithml/serve.md - utils: madewithml/utils.md theme: readthedocs plugins: - mkdocstrings watch: - . # reload docs for any file changes -
Serve our documentation locally:
python3 -m mkdocs serve
This will serve our docs at http://localhost:8000/:

Publishing
We can easily serve our documentation for free using GitHub pages for public repositories as wells as private documentation for private repositories. And we can even host it on a custom domain (ex. company's subdomain).
Be sure to check out the auto-generated documentation page for our repository. We'll learn how to automatically generate and update this docs page every time we make changes to our codebase later in our CI/CD lesson.
In the next lesson, we'll learn how to style and format our codebase in a consistent manner.
Upcoming live cohorts
Sign up for our upcoming live cohort, where we'll provide live lessons + QA, compute (GPUs) and community to learn everything in one day.
To cite this content, please use:
1 2 3 4 5 6 | |